Adobe Campaign Standard
Process of building an end to end campaign
Building campaigns using Adobe Campaign Standard (ACS), empowers marketers to orchestrate, deliver and measure omnichannel customer experiences, at scale. Experiences that drive engagement, revenue, loyalty and brand advocacy.
The software promotes a quality customer experience with its personalised, targeted communications, delivered at the right time throughout the customer journey.
With this cheat sheet, you can easily build a simple, but effective campaign. Later in this series, we’ll show you just how much more is possible with ACS!
In ACS, there are five communication channels available:
- SMS message
- Push notification
- In-App message
- Direct mail delivery
For each channel, specific functionalities are available. As an example, the SMS channel, manages STOP SMS messages and stores incoming recipient responses in your database.
The five key steps to building and executing a campaign in ACS are:
- Select and define your marketing activity
- Define target audience and test profiles
- Design your email content
- Prepare for the send: calculate the target population, generate the message contents and send proofs
- Send and monitor: send the message, check delivery results and check the dedicated delivery reports.

In this article, we will focus on the email channel. There are various email types available to meet a range of marketing purposes. These include:
- Single-send: suitable for one off or ad-hoc emails
- Recurring: suitable for repeatable sends such as anniversary emails
- A/B testing: helps compare up to three email variations
- Transactional emails: are triggered based on customers’ interaction with your brand
Step 1. Select and define your marketing activity
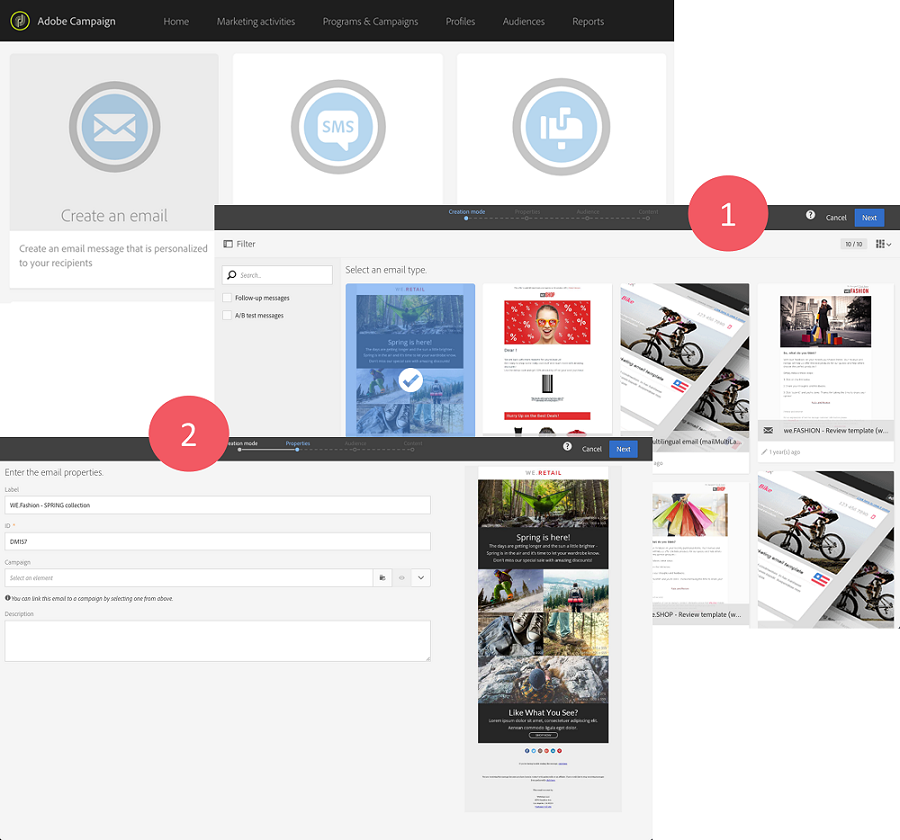
On the homepage, you can choose to create an email campaign either by using the email wizard, via a parent campaign, marketing activity list or workflow. Once inside:
- Select a pre-configured template. For example, a transactional email template, anniversary or welcome template.
- Describe the email’s properties in the label, ID and description fields. The main properties are there for campaign governance purposes.
Step 2: Define Target Audience & Test Profiles
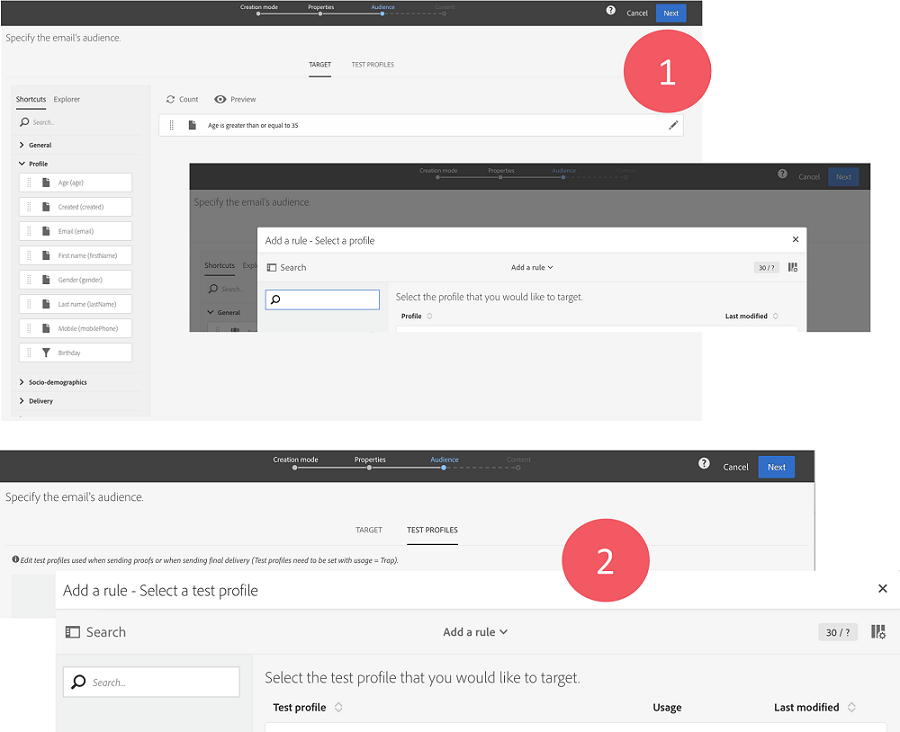
Define the target audience for your message, as well as the required test profiles
- Define the target audience for your email by drag and dropping the targeting fields from the left, onto the canvas. You can also select a single test profile if you are not yet ready to develop the targeting. Click Preview to see the audience who is eligible for this campaign.
- The test profiles allow you to include additional recipients who do not match the defined targeting criteria but need to receive a copy of the mailing. They are added to a messages audience to detect any fraudulent use of your recipient database or to confirm the emails have arrived in inboxes.
Step 3. Design Your Email Content
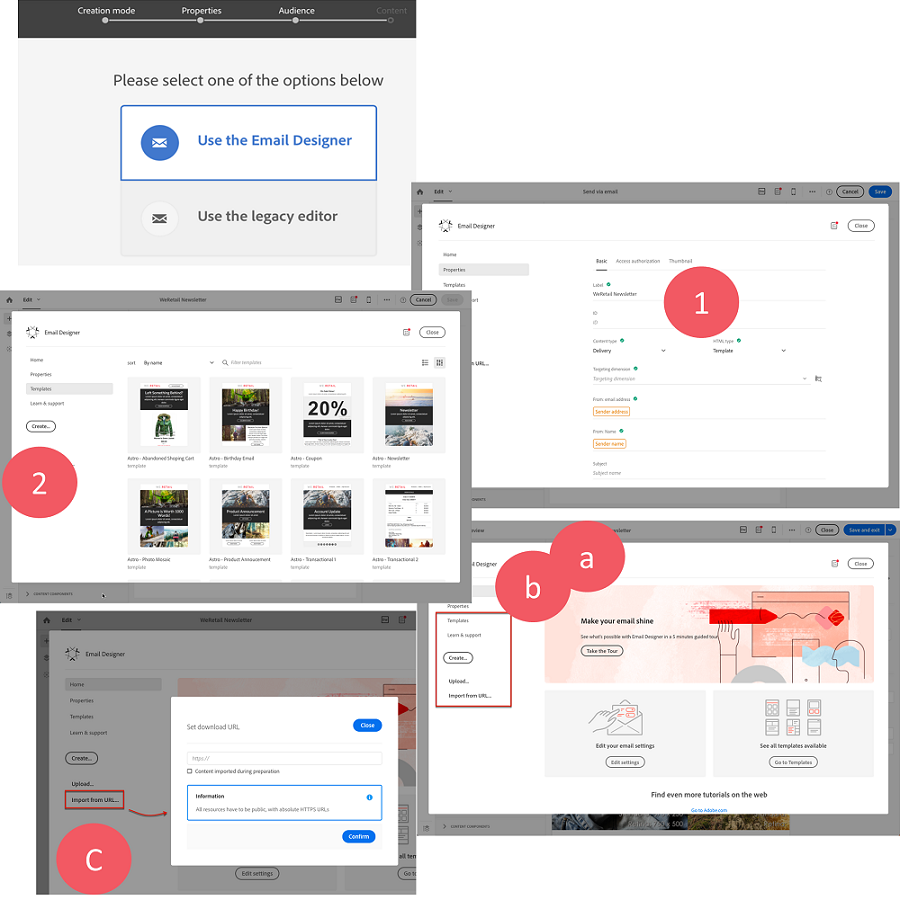
Once your targeting is set up, the Email Designer home page will appear. There are three ways to design content: using a pre-defined template, content upload, or URL import:
- Define the message content, sender name and subject. Using the Properties tab enables you to edit the email’s details such as the label, the sender’s address and name, or the email subject. You can also access this tab by clicking the email label on top of the screen.
- The Templates tab contains out-of-the-box HTML email templates. If you don’t wish to use one of these, you can also design your content via the following options:
- Create button – to build from scratch
- Upload button – to upload a HTML file
- Import from URL button – to retrieve content from a URL
Step 4. Prepare for the send
Once you’re happy with how your email looks, it’s time to prepare the data and produce any proofs required for pre-deployment approvals.
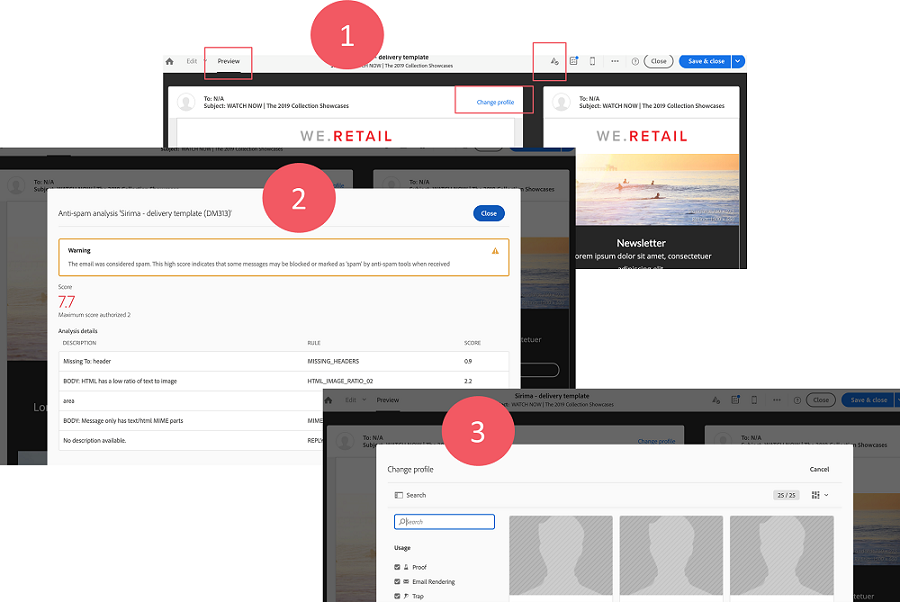
- In the Email Designer, click the Preview button. A desktop view and a responsive mobile view of your email are displayed side by side.
- Click the Anti-spam analysis button to find out about any warnings.
- Select the Change profile button to choose the test profiles you’ll be using in your proofs.
Confirm creating the email to save your email after editing the content. The email dashboard is then displayed.
PREPARE THE DATA
Once these preparation steps are finished, the target population is calculated, and an email is created per profile.
CREATE & SEND PROOFS
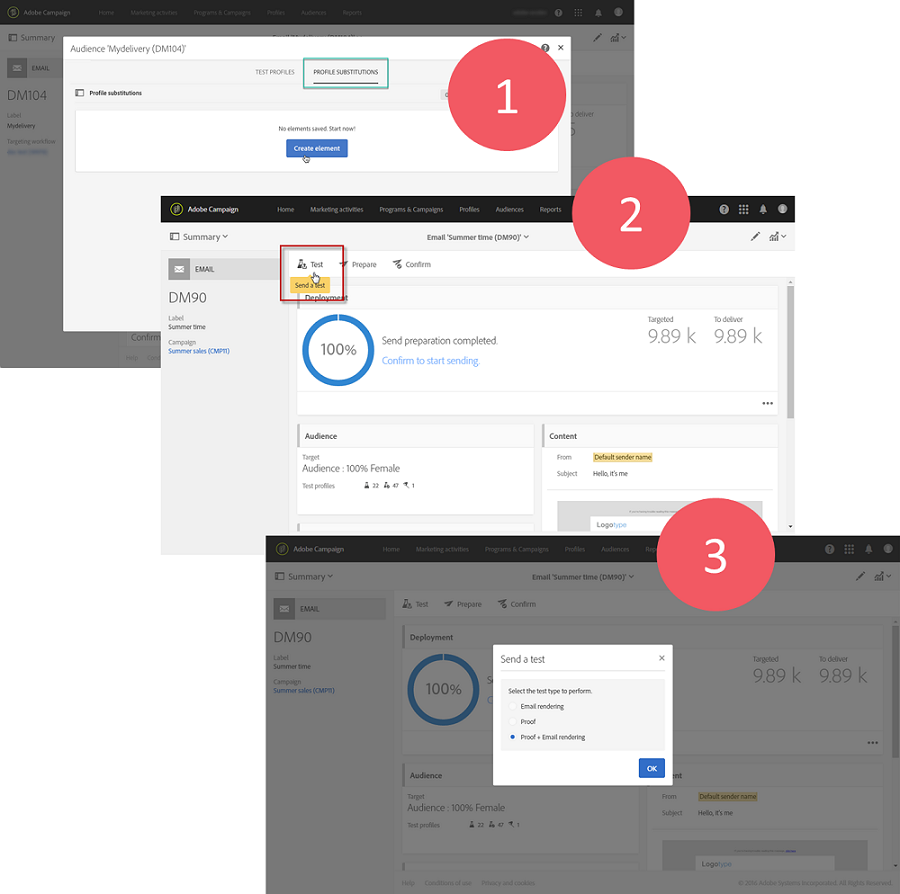
A proof allows you to test a message and get approval before sending it live. Test profiles must be included in your message’s audience to do so. Substitution profiles allow you to place yourself in the position of one of the targeted profiles and to get an exact representation of the message that the profile will receive. This feature is available for the email channel only. Test profiles can be used by following these steps:
- To start preparing the test send, click the Prepare button located in the action bar. The amount of time will be dependent on the size of the overall target audience.
- The Deployment block shows the preparation progress, then the preparation statistics: number of targeted messages, number of messages to send, etc.
- To view the preparation logs, click the button located in the bottom right of the block. The Deployment window opens, correct any errors then restart the preparation.
- The last log message displays any error messages and the number of errors. A specific icon shows the encountered error type: the yellow icon indicates a non-critical processing error, the red icon indicates a critical error that prevents the delivery from being started.
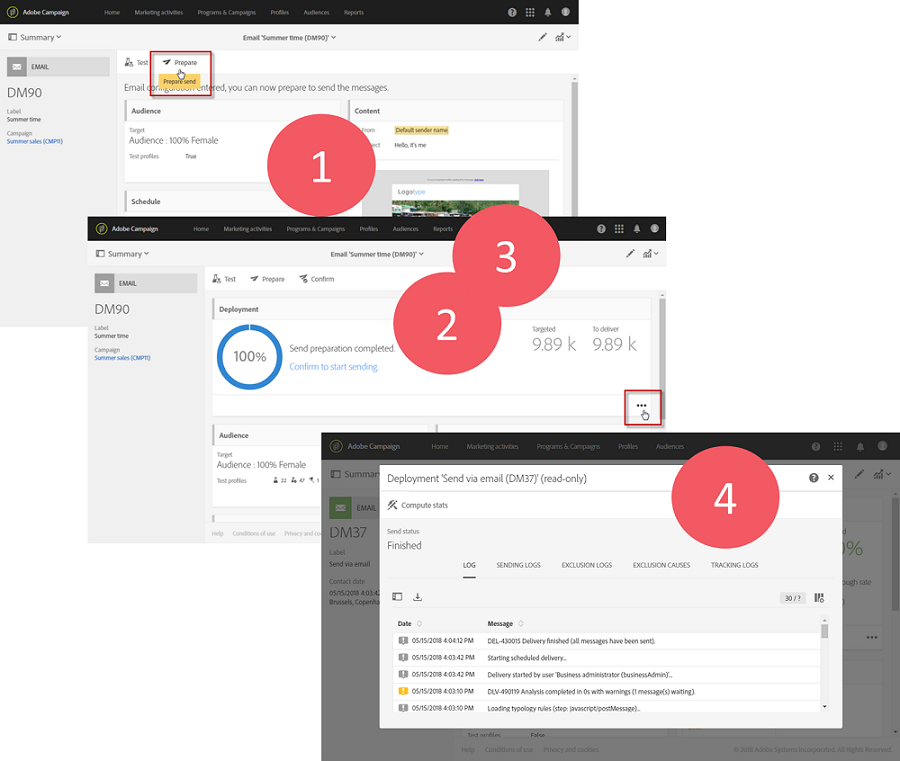
Once the preparation has been completed, your message is ready to be sent.
To send proofs, follow these steps:
- Click the Send a test button.
- Select the type of proof you would like to use (Email Rendering – select this option to test your message content, including dynamic content variations) – (Proof – select this option to test the default message before sending it to the main target) – (Proof + Email Rendering – this option combines the two previous options).
- Confirm your choice. The proofs are sent to the test recipients that have been configured.
Step 5: Send & Monitor
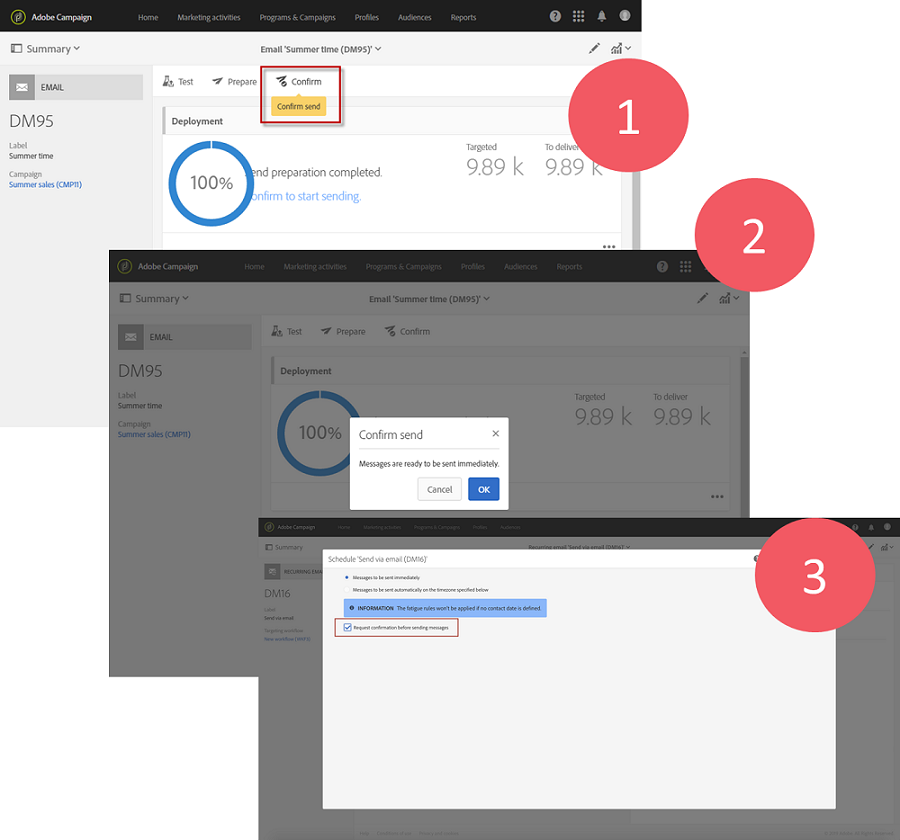
Once you have finished preparing your messages and any approval steps have been carried out, you are ready to deploy the mailing.
- To send your delivery, click the Confirm send button found in the message’s action bar.
- You will be asked to finalize the send definitively by clicking the OK button.
- The message is being sent. If the message is scheduled, it will be sent when sending time is reached.
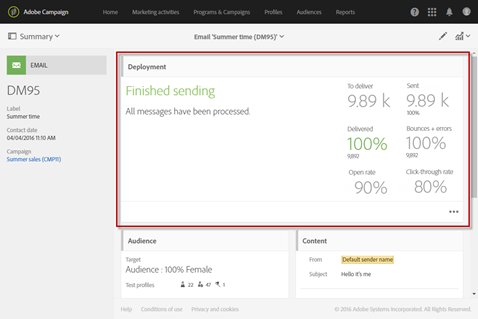
The Deployment block shows the progress of the send.
Once the message is sent to the contacts, the Deployment zone shows your KPI (Key Performance Indicator) data.
- The number of messages to deliver
- The number of messages sent
- The percentage of messages delivered
- The percentage of bounces and errors
- The percentage of open messages
- The percentage of clicks in the messages (for emails)
- The Open rate and Click-through rate are updated every hour
Including:
Contact us for more details if you have questions on any step. For full step by step documentation and training, you can visit the Adobe website.
Next up in this series, we will show you how to personalise according to the profile, behavior, preferences, and needs of your customers. For assistance in getting started with Adobe Campaign Standard, or to discuss your marketing needs, get in touch with Purple Square today!
Like what you see?
Subscribe to our newsletter for customer experience thought leadership and marketing tips and tricks.